

Digital Photo Tip: Think Triangles


Exposure mode and ISO dials on the Canon G12 compact camera
Most digital cameras, except for the very simplest, offer several exposure modes . How do you choose which one to use? It depends on what’s most important in the photo you’re making. This month I’ll explain the difference between the primary modes: Program Automatic, Aperture priority, Shutter priority, and Manual. Your camera may also have a variety of Scene modes. Continue reading
Tuesday morning, April 23 the crew from A-1 Builders arrived to begin work on renovating the old feed store into my new photo studio. I’d already done a lot of the demolition work to remove wall and ceiling coverings, take out a lot of the old floor, and get rid of the debris. Doing that work myself saved us a fair chunk of change, built muscles in my arms and shoulders, and made it possible for the professionals to get most of the remaining demolition work completed the first day.


With the advent of digital photography we have so much post-processing control in applications like Adobe Lightroom, Photoshop, or Photoshop Elements that many of the filters we once used are no longer needed. But there are two exceptions, filters that I still carry and use in my outdoor photography. This month I’ll remind you why a polarizing filter is still important.
Most people, when they think of a polarizing filter, associate it with darkening a blue sky. That’s certainly one of the most common uses of this filter. You can compare the effect of the polarizer in this photograph of our home made on a sunny afternoon with the sun roughly 90° to the left of my camera. Without the polarizer the grass is lighter green, the sky is a pale blue, and the brightness values of the yellow paint, the grass, and the sky are similar. Continue reading

Turner Photographics studio exterior
I’m moving my studio to our home on the outskirts of Bellingham this summer. Last fall we purchased five acres at 4682 Wynn Road, just off the Slater Road I-5 exit, and moved into the house in January. My office is upstairs in the new studio building and we start renovation of the first floor into a spacious new studio this month. The new front entrance will be to the left of the big garage door you can see in the photo above.
The studio building was built in 1928 as a feed store. It was originally located on the corner of Rural Avenue and Highway 99 and was moved to its current location in the early 1960s when Interstate 5 was constructed. Continue reading

This holiday season you can’t avoid coming across wonderful light displays that add a festive touch to our long nights. Whether it’s the lights on your own home, a favorite neighborhood you like to visit, or one of the great public garden holiday light displays, you can make great photographs of the lights. Just don’t expect to get top results with your phone camera (although it doesn’t cost you anything to experiment). Continue reading
One of the things that sets professional photographers apart from snapshooters is that we’re always looking for the light, seeing how it plays across our subject. Modern cameras are very good at getting an acceptable exposure in almost any light, but we’ve all seen thousands of photos taken in very bad light. You can do better. Here’s one approach.

Natalie and I were visiting her mother, Betty, not too long ago. She lives just a mile from us so we’re there often. Her home has a wonderful sun room, with windows all along the south wall and a couple of skylights so the room is bathed in light. Betty spends a lot of time sitting by the window where she can watch the birds in her garden or reach a book on the shelves beside her chair. Continue reading
People have been taking snapshots of friends, family, and the places they visit since George Eastman first popularized photography with the first Kodak camera in 1888. In the 125 years since then a nearly uncountable number of photographs have been made. The pace of picture taking has only increased since the invention of digital photography and digital cameras becoming affordable to nearly everyone.
People upload 300 million photos every day to Facebook alone, according to a July 2012 story in USA Today. Sites like Facebook, Flickr, and Pinterest have become today’s photo albums. But will they be around in 75 years? Will our children and grandchildren be able to look back at these glimpses into our lives?
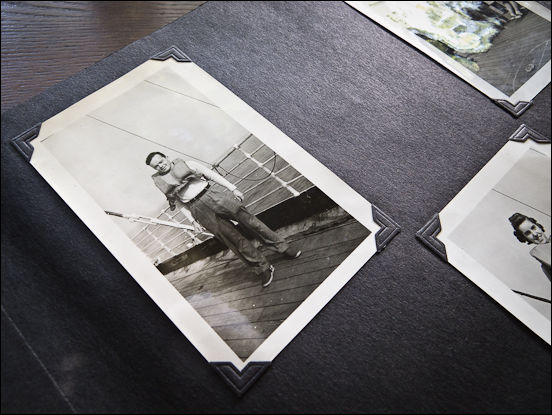
My parents were both avid scrapbookers when they were in their twenties, the same age as our two boys are today. They both had cameras and they took pictures of their adventures. Continue reading
I love gray skies. They’re a giant soft source, wrapping the world in flattering light that is nearly perfect for photography. Given that it’s still spring in western Washington, we’ve had a lot of gray skies and rain lately. The forecast has been rain, alternating with showers, a bit of drizzle, some mist, and an occasional sun break. It’s a perfect time to head outdoors with a camera.

On one of the last days of May I paid a visit to the native plant demonstration garden on Memorial Highway a few miles west of Mount Vernon. The weather was overcast with intermittent light rain. In other words, ideal for photographing specimen plants and flowers.
So what is it that makes overcast skies so nice for photography? Continue reading
The strongest photographs lead the viewer to concentrate their attention on the subject and minimize anything that might be distracting. One thing that’s easy to miss is the relationship of the horizon line to your subject, particularly when photographing people. You don’t want the horizon to slice through someone’s head. Continue reading