Digital Tip: Exposure Part I – ISO
When you go to the beach do you want a sunburn, a nice healthy tan, or a pale complexion? You’re in control by how much you expose your skin to the sun. If I spend too much time outside without my hat, my balding head gets burned. That’s analogous to an over-exposed photograph, although the results usually aren’t so painful.
This month and the next few I’m going to help you make sense of the three variables that interact to affect photographic exposure: the sensitivity of the digital sensor (or film), how long the light strikes the sensor, and how big is the hole the light passes through. We call those the ISO, shutter speed, and aperture. I’ll get to each of those and how they interact in this and the next few installments, along with exposure compensation.
You may wonder why this is important if you always use your camera in its fully automatic mode. In full auto, your camera is measuring the light and setting the ISO, shutter, and aperture to expose the subject correctly. Taking control yourself gives you creative options you don’t have in full auto mode.
You may want to override what your camera thinks is correct. That’s often a good thing, because all camera meters (and the handheld meters pros use) are calibrated based on an 18% gray card. That’s about the reflected brightness of medium green foliage, a little darker than Caucasian skin tone.
So how do ISO, shutter speed, and aperture work together to affect exposure? To simplify the discussion, let’s assume for now that the amount of light falling on our subject stays the same.
There are many combinations of ISO, shutter speed, and aperture that will give the same exposure. As photographers, we make choices based on both creative and technical needs. Sometimes these blur together and the difference between technical and creative is fuzzy. We might choose a shutter speed fast enough to hand hold the camera, stop the motion of a soccer ball, or blur a waterfall. We might pick a large aperture to get shallow depth of field or a large one to make everything sharp from near the camera to distant mountains. We choose a low ISO to reduce digital noise.
This month let’s look at ISO in more detail. I’ll cover shutter speed and aperture in the future.
ISO
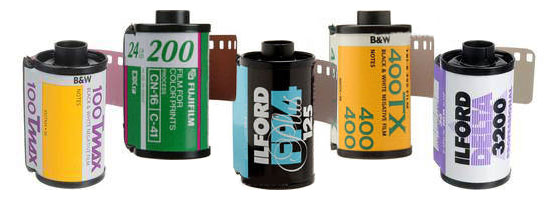
ISO is a measure of how sensitive film or a digital sensor is to the light falling on it. The lower the number, the less sensitive and the more light required for a proper exposure.
At ISO 200 the sensor is twice as sensitive as at 100. ISO 400 is twice as sensitive as 200, or four times as sensitive as 100 (2 x 2). The ability to change ISO from one frame to the next is pretty amazing for those of us began our photo careers with film and had to change film if we needed a faster or slower film speed (another term for ISO). It’s one of the huge advantages of digital photography.
In actuality, the camera’s electronics are turning up the gain (like the volume control on your stereo) on the signal coming from the sensor, which means any noise gets amplified, too. That’s why lower ISO settings have less noise than high ones.
Digital noise shows up as random colored speckles in the dark areas of your photo. It’s roughly equivalent to film grain or the “snow” on an old television when the signal was weak.
I like to use the lowest ISO setting that will give me a good exposure at the shutter speed and aperture I’ve chosen for creative reasons. But I’ll trade a little noise for being able to get a picture in low light conditions.
Here’s a guide to which ISO setting you might want to use in different lighting conditions:
| ISO 50-100 | Bright light outdoors on a sunny day |
| ISO 200-400 | Overcast or cloudy days, at dusk, or in the woods |
| ISO 400-1600 | Indoors or night, sports or wildlife action |
| ISO 1600 and above | Indoors or night with very low light levels |
The lowest ISO setting on many cameras is 100 or 200, and some cameras go far beyond 3200 so you can shoot in near darkness.In my own professional work I rarely use an ISO above 400, but I don’t do a lot of night or action photography.
Most digital cameras have an Auto ISO setting so the camera will choose the ISO for you. This can be great if you don’t want to make the choice yourself and are willing to accept a little extra noise in some of your photos. On some cameras you can set the highest ISO the camera will use in its Auto mode and put an upper limit on noise. Personally, I don’t use the Auto ISO mode on my cameras. But I’m a control freak.
Geeky Trivia: ISO stands for the International Organization for Standardization. There are actually separate standards for measuring the sensitivity of negative film, slide film, and digital imaging systems. But in practical terms the numbers are basically equivalent.
Next month… I’ll discuss shutter speeds and how to choose what’s appropriate to your photo subject.

