Observe and Control the Light
Photographers, and artists of all kinds, learn to see light. We look at where it’s coming from, how it plays on our subjects, and how much contrast it yields.
I made this series of images last week during the field demonstration part of my pocket camera wildflower photography class at the North Cascades Institute while my students watched me work. They looked at the images immediately on my iPad so they could compare what they saw from where they stood with what I was getting as I moved around my subject and then used a couple of diffusers on a close-up.

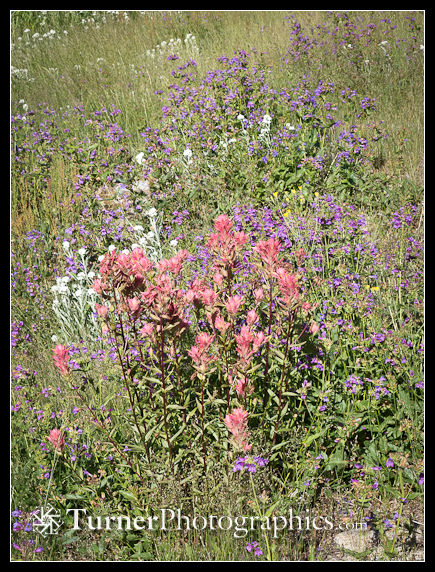
We were at the Bridge Creek trailhead, where the Pacific Crest Trail crosses Washington Highway 20. These Giant Red Paintbrush (Castilleja miniata) were just a few feet from the edge of the parking lot. It was about 9:15 in the morning under a cloudless blue sky, so the sun was about 30° above the horizon and more than halfway to its peak. In short, the sunlight was strong, high, and bright. In the first photo you can see my shadow as I stood with my back to the sun.
You can see the scene, with me and my students, in a image one of them made and posted on Flickr.
Back in the early days of photography it was almost required to have the sun at your back to make sure you got a reasonable exposure on slow film. You’ll still get a reasonable exposure, but with the same light falling across your subject it will look flat and lifeless.
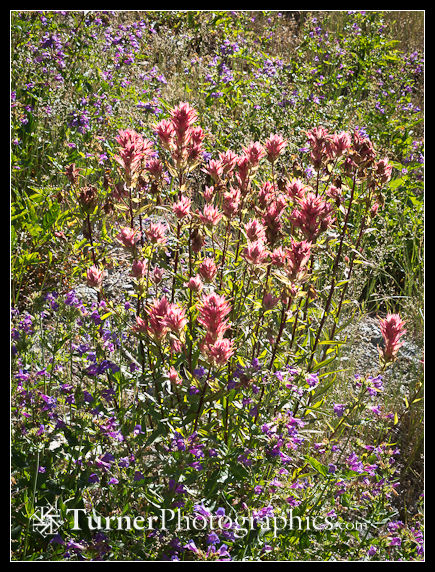
The next photo is from the same position, just framed tighter on the flower meadow. The sun is at my back, so the light is the same on all parts of the subject. It looks flat and lifeless. Colors are dull. Most people would say the colors look washed out.

Next, I moved to my left about 90° around to the side of the clump of paintbrush. Now the sun is coming from the right side of the frame. Notice that there’s now a lot more texture and dimension to the image. The colors are more vivid, too. The only thing that’s changed is my camera position.
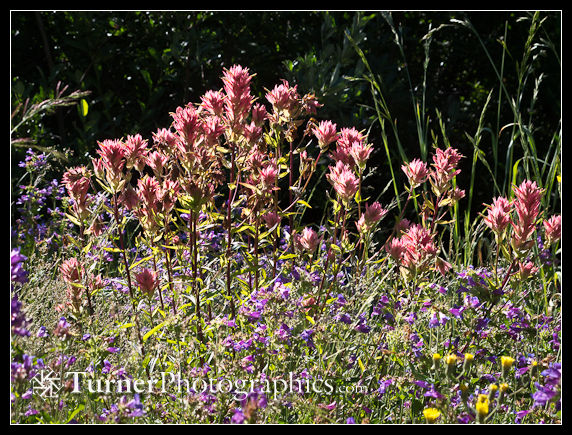
For the next frame I moved another 90° so I’m now pointing the camera in the direction of the sun. Because I’m aimed down at the flowers I don’t have an issue with flare from the sun hitting the lens. Texture is even more strongly accentuated now. The edges of the colored bracts on the paintbrush are almost glowing from the light passing through them.
Continuing around the circle another 90° we have side light again, but with the sunlight coming from the left instead of the right. I’ve lowered the camera so the flowers are outlined against some deeply shaded shrubs that photographed nearly black.
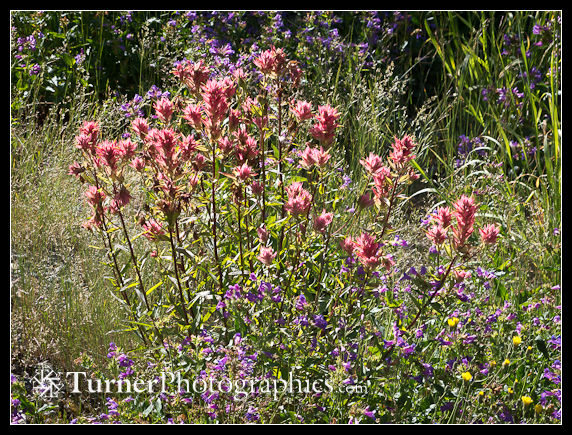
The only change between this frame and the previous one is that I’ve raised the camera to eliminate the black background. This one has a different feel, perhaps a little busier than the previous. It’s a creative choice you can make in the field.
All of these first images were made with no filters and no light modifiers. They’re essentially straight from my Canon G12 camera, with just a slight bit of sharpening and a subtle vignette applied in Adobe Lightroom before exporting web-sized JPEGS.
Light Modifiers
Now let’s look at the effect of two different diffusers on a close-up of just a few colorful paintbrush bracts. In case you didn’t know, the colored parts many people think of as the flowers on paintbrushes are actually bracts, modified leaves. The actual flowers are those little stick-like green things. You know about colored bracts if you’ve ever seen poinsettias with their large and showy red bracts around tiny little flowers.
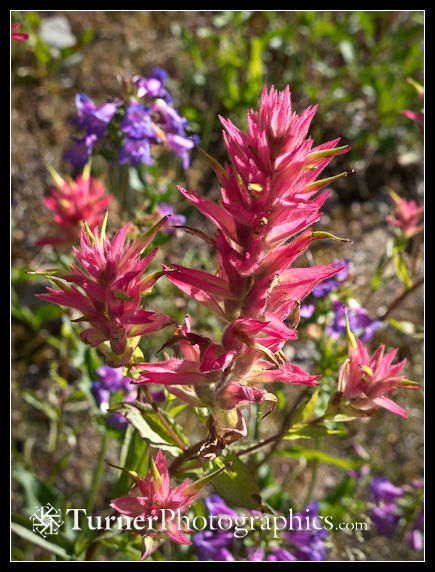
This first close-up was made with the sun coming from the right side of the frame and a little bit toward the camera. You can tell that by observing the brightness difference between the left and right sides of the largest “flower.” Light is coming through the red bracts on the right side while those on the left are shaded.
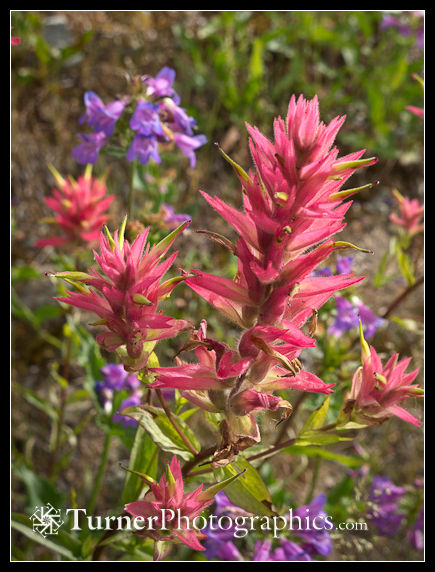
Now I’ve placed a 1-stop “silk” diffuser close to the subject on the right-hand side to soften and spread the sunlight. Notice that the bright parts are less bright, with softer highlights. The shadowed areas aren’t as dark so we can see more detail. This diffuser is a Westcott 36″ x 48″ 1-Stop Silk Diffuser. I use this diffuser a lot because I can usually still see a hint of a soft shadow, so I don’t lose the directionality of the light source.
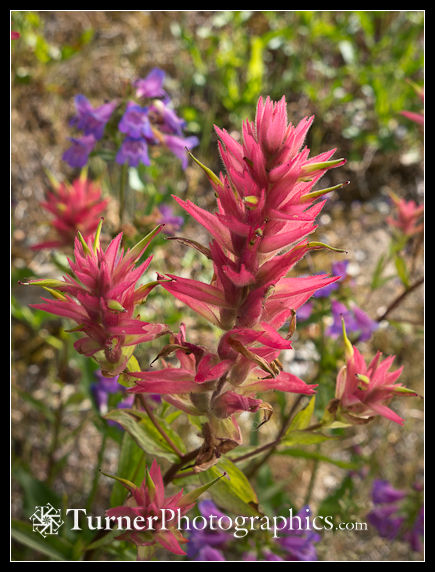
For the final image in the series I placed a 2-stop diffuser in the same position as before, close to the subject on the sunlit side. The brightness difference between the highlights and shadows is even less and the whole image has a softer, more evenly lit appearance. The diffuser is a Photoflex LiteDisc 32 inch Translucent. On this very bright day the effect is rather nice, but I find myself using this diffuser very infrequently because in many cases it makes the light too flat for my taste and I end up using a small reflector to bounce additional light in to add some highlights and restore texture and dimension. That’s a lot of stuff to be holding and positioning with just two hands, even with the camera on a tripod as it was here.
Both of these diffusers are great tools for softening harsh sunlight for plant portraits. They work just as well when photographing people or pets. Use care to make sure that the diffuser covers everything in the frame, including the background. It’s pretty obvious when you have a shadow of the diffuser frame running through the background of your image.
What’s really important is seeing where the light illuminating your subject is coming from. I almost never photograph anything with the light source at my back. Most often I find myself using some form of side- or back light. I want to see texture and form as I render a three-dimensional subject in a two-dimensional photograph and light direction is my most important tool.
Experiment for yourself. Go find a subject that you can photograph from all sides and see how changing your camera position affects how the light plays on your subject. If you don’t have a store-bought diffuser, you can improvise with a white sheet or shower curtain. Ask a friend to hold it for you, or make a frame from wood or some PVC pipe and fittings.


Thanks for taking us through this step by step. Really interesting and helpful.