Digital Photo Tip: Organizing Chaos

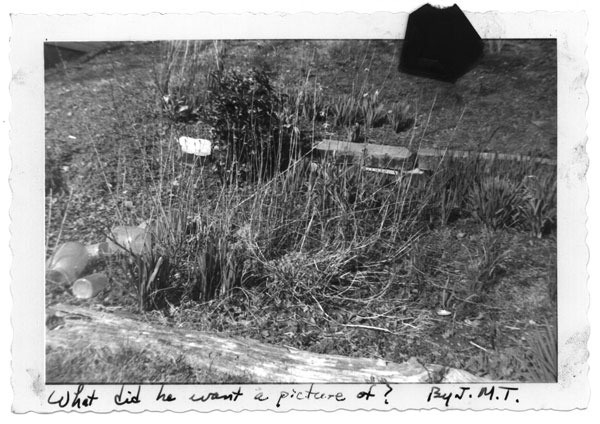
Something must have caught my eye here, but it isn’t evident.
Have you ever come back from a photo excursion, looked at one of your pictures and wondered, “What was I seeing when I snapped that photo?” My mother even saved some of my early “what’s that?” pictures, like the one above. I must have seen something interesting in that early spring messy corner of my dad’s garden but it sure didn’t come across in the picture. I don’t know why she didn’t toss those clunkers, because that’s what she should have done and what I do today. (I was 7 when I took that picture in 1961.)
Sometimes it’s downright hard to find the photograph in a chaotic scene. I’ll feel there’s something interesting in there somewhere, but it’s not always obvious how to convey what I’m seeing or feeling in the frame. Slowing down and really looking for the story is a good first step.
A few days ago I took a walk through our woods with my camera. Spring growth was fresh and green, the early morning light was soft, and I felt engaged with the forest. I wanted to capture how the woods looked and felt to me.
Our eyes and brain are very good at filtering out distractions, allowing us to concentrate on just one thing, even if it’s fairly fairly small within our field of view. We may look at a single flower, or a pattern of tree trunks, or a deer path through a carpet of bleeding heart, while ignoring the surrounding chaotic mass of salmonberry stems or fallen branches. But our camera’s lens picks up everything. As we look through the viewfinder we may still only see that thing that attracted our eye in the first place, ignoring the mess that surrounds it.
![1501059 Fringecup foliage among moss [Tellima grandiflora]. Turner Photographics Woods, Bellingham, WA. © Mark Turner Fringecup foliage](/wp-content/uploads/2015/05/Turner_1501059.jpg)
Sometimes the solution is to move a lot closer to your main subject, placing it prominently in the foreground. Experiment with moving the camera from side to side, or up and down, to eliminate the distracting elements and to create a strong foreground-background relationship. That’s the technique I used for this photo of fringcup. I also chose shallow depth of field to separate the foliage from the background.
![1501072 Coast Black Gooseberry at base of burned out stump w/ Bigleaf Maple trunks, Vine Maples bkgnd [Ribes divaricatum; Acer macrophyllum; Acer circinatum]. Turner Photographics Woods, Bellingham, WA. © Mark Turner Burned Stump](/wp-content/uploads/2015/05/Turner_1501072-blend-bw.jpg)
This burned-out tree trunk is one of my favorites in our woods. For this photo I carefully placed my camera to avoid a very messy patch of smaller trees that are just out of the frame to the right, as well as more chaotic vine maple branches to the left. I made small horizontal movements to get just the right amount of separation between the burned stump and the bigleaf maple trunks to the right. There’s always an element of compromise between what’s physically possible (something else in the way, or the ground drops off beside the camera) and the ideal in my mind’s eye. Adjusting the exposure to hold detail in the burned wood while letting the background foliage render brighter also helps organize this scene.
![1501086 Vine Maples w/ deer trail through Pacific Bleeding Heart groundcover [Acer circinatum; Dicentra formosa]. Turner Photographics Woods, Bellingham, WA. © Mark Turner Deer Trail](/wp-content/uploads/2015/05/Turner_1501086-bw.jpg)
We have masses of bleeding heart carpeting the ground under the chaos of vine maples. I found this spot with a deer trail beside a moss-covered log and placed my camera so the trail would form a line leading into the frame and toward the larger tree. I needed the trail to provide a subtle focal point.
![1501093 Bigleaf Maple w/ Snowberry understory [Acer macrohyllum; Symphoricarpos albus]. Turner Photographics Woods, Bellingham, WA. © Mark Turner Bigleaf Maple](/wp-content/uploads/2015/05/Turner_1501093.jpg)
I’m not usually a fan of centered compositions, but this tree called for this framing. It’s a somewhat symmetrical subject, flanked here by two smaller trees in the distance. I experimented with moving closer and farther to the tree to decide how much of the canopy to include, as well as how much of the snowberries at the base. The two smaller trees help hold the eye in the frame, bringing us to the pattern of branches reaching out from the trunk. Again, the exposure is biased toward the tree trunk, letting the sky go white.
Chaos, distractions, and busy backgrounds are always around us. Our job as a photographer is to make sense of the scene, minimize distractions, and bring our subject to the attention of our viewers. It always helps to fill the frame with the subject and to find a way to set it apart from everything else. Contrast — whether brightness, sharpness, color, or texture — plays a big role. Take a little time, think about what you’re really photographing, adjust your composition, and only then release the shutter.
All of the images from our woods were made with my 24mm lens, which forced me to move closer or farther from my subject to adjust my framing rather than take the shortcut of using a zoom. I made the black and white conversions in Photoshop with Nik SilverEfx Pro 2.

