Digital Condoms
Digital photography is a little like sex. It’s a lot of fun, you can do it often, there are almost endless variations, and if you’re not careful there can be unintended consequences.

One of my pocket camera workshop students at North Cascades Institute this summer suffered one of those unintended digital consequences when all of her photos from the day disappeared when she thought she was copying them from memory card to computer. I’m not sure exactly what Alice (I’ve changed her name to protect her dignity) did because I wasn’t looking over her shoulder, but I have a good idea what happened. And I have a strong suggestion for a better procedure that protects you from losing your precious photos. That protection is your digital condom.
Alice popped her memory card into the card reader on her computer and opened her photo cataloging program. Then she added the photos on the card to her catalog, at the same time telling the software to erase them from the card. Thumbnails showed up in her catalog, but when she tried to look at full-size images they were gone.
There were two settings in her software that Alice had set wrong:
- Add photos to catalog from a memory card without moving them
- Erase card after adding photos to catalog
Here’s the process I use to get my photos off my memory cards and into my computer. There may be other techniques, but most pro photographers will do something pretty similar to what I do.
- Copy files from card to computer with the operating system
- Add to catalog without moving
- Backup to external hard drive or DVDs
- Format memory cards in camera just before use
Copy Using Operating System
Copy photos from the memory card to a folder on the computer using the operating system, either Windows Explorer or the Mac Finder. I may be old-fashioned, but I like to know exactly where my important image files reside. I also like to keep them organized in a logical structure.
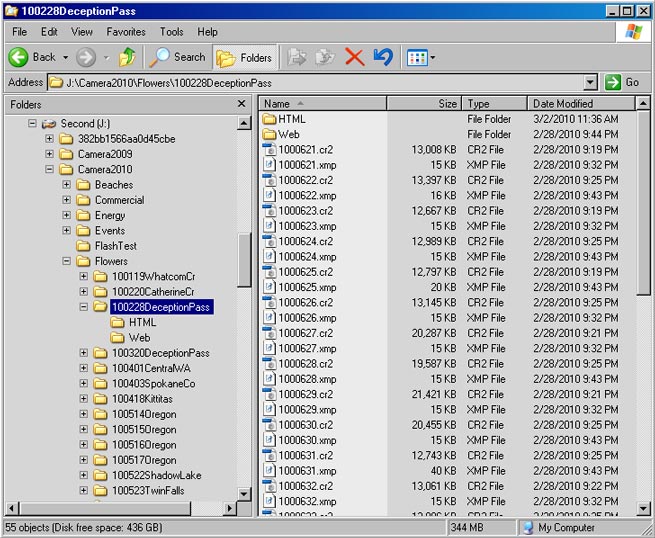
I set up a primary folder (directory) for each year, then major subject folders like gardens, wildflowers, and portraits. Inside the gardens folder I make a folder for each day and location. Think about a file cabinet full of your photos for this year. Each drawer holds one subject. Inside each subject drawer there are folders for each day’s photos, and inside the folders are the photos themselves.

Your folder structure will likely be different from mine, depending on what you photograph, but the point is to make it logical, clear, and human-readable. You want to be able to find your stuff. The screenshot shows my folder structure, with the right-hand pane listing the individual wildflower photos I made on February 28 at Deception Pass. I’ve renamed each photo to give it a unique number, unlike my cameras which may eventually repeat file names.
With a logical folder structure in place you can copy your photo files by dragging and dropping them from memory card to hard drive. Once they’re copied, eject the memory card and put it aside. Your photos will still be on the card as a backup.
Add to Catalog Without Moving
Now that your photos are on your computer you can add them to your catalog, insert your contact and copyright information, and write captions. I use Adobe Lightroom (LR), but it’s not the only catalog software choice.. In the LR Import dialog I Add photos to catalog without moving them. This puts them in the catalog where I can see them, but leaves the files where I put them when I copied them from my memory card. The exact wording for the settings in other programs like Picasa or iPhoto will be different, but the same capability is there.
I also use a metadata preset to add my contact and copyright info to all images automatically. But that’s another topic.
It’s critical to understand that adding your photos to a catalog does not make another copy of the photo file. The catalog is just a big database points to where your original photo files are stored. It includes a low-resolution reference thumbnail for each photo as well as information about them.
Backup
Backup your photo files onto DVDs and/or an external hard drive. I backup everything before I start editing out the clunkers and renaming the keepers. That way if I accidentally hit Delete and toss a keeper I can restore it from my backup. I’m also protected in case a file gets corrupted on my hard drive.
Then, after I’ve done my edit, renamed my files, and added captions, I’ll back them up again. This becomes my primary backup in case the internal hard drive in my computer crashes.
Format Memory Cards in Camera
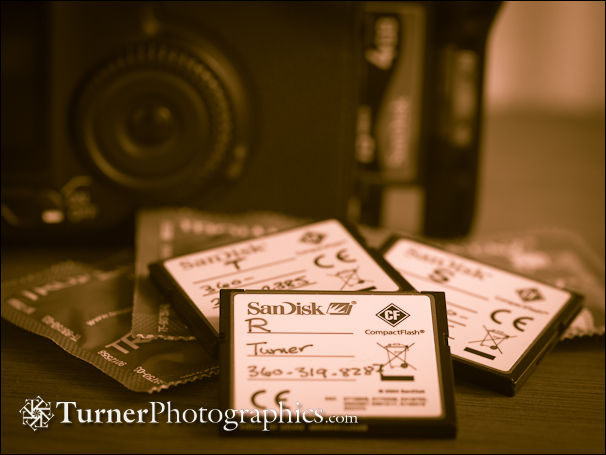
I have a stack of memory cards that I labeled A-W. I use them in sequence, so rarely will I need to take a card from my computer and put it back in the camera for immediate use. When it’s time to use a card again I put it in the camera and hit the Review button to quickly see what’s on it (and make sure I didn’t accidentally put the card I’d just taken out back in again). Only then do I format the card.
I prefer to format my cards in the camera each time I use them for a couple of reasons. First, formatting may be done slightly differently by different cameras and computers so to avoid problems writing to the card in the camera it’s safest to format the card in the camera. Second, erasing photos one at a time in the camera takes a lot of time and can also occasionally lead to improper recording when you write new photos to the card. I’d rather be safe than sorry.
For much more detail on managing your digital photos, I like Peter Krough’s book, The DAM Book: Digital Asset Management for Photographers.
So there you have it. A digital condom to protect your precious photographs. Like sex, it sounds more complicated when you describe it than when you do it. So just do it. And be safe.
If you have questions, post them in the comments.


Fantastic article! The headline definitely got my attention and the information was very helpful. I’ve done something similar – always copy and paste (not cut and paste) to a folder in my photos folder, rather than letting a program download and organize my photos. I like the idea of making an initial backup before doing any organizing or editing. It’s so easy to lose track or accidentally hit save when you didn’t mean to.
Another thing I see people doing a lot is uploading pictures to Facebook or some other online site and using that as a back up and or/storage system. I’m all for sharing on social media, and it’s great to have photos saved online, but most of these sites downgrade your photo size and quality so if you delete your originals you’re losing a lot. Also, if their servers crash or there is some other error…. there go your photos. I’m obsessed with having multiple backups!
Thanks again for a great article.
Naomi, good point about Facebook and other online sites not being a good backup. When I post to social media I make a downsized copy at 604 pixels on the long side, which is the max Facebook stores, and add my visible watermark. To me those online images are throw-aways, just a small copy for sharing.
Some photographers like to have both an onsite and an offsite backup, the latter often another external hard drive stored at a friend’s house or even in a bank vault. I’m not that obsessive, but perhaps I should be.
Good article, Mark. My workflow is identical to yours, and I didn’t even read the DAM book! lol A simple rule of thumb I use and tell other photogs is: “If it’s not saved TWICE, it’s not backed up.”
Thanks again for your excellent newsletter and informative articles!
Larry
Pingback: Digital Photo Tip: Backups Are Boring – Turner Photographics Newsletter | Turner Photographics